Friends of the West End Park

Historic West End*Atlanta*GA

Companion Planting (Potatoes) February 6, 2010

WHAT TO PLANT WITH POTATOES?

Companions for potatoes are bush bean, members of the cabbage family, carrot, celery, corn, dead nettle, flax, horseradish, marigold, peas, petunia, onion and Tagetes marigold. Protect them from scab by putting comfrey leaves in with your potato sets at planting time. Horseradish, planted at the corners of the potato patch, provides general protection. Don’t plant these around potatoes: asparagus, cucumber, kohlrabi, parsnip, pumpkin, rutabaga, squash family, sunflower, turnip and fennel. Keep potatoes and tomatoes apart as they both can get early and late blight contaminating each other.


GROW POTATOES IN GARBAGE CAN February 2, 2010

This month as I prepare my garden for early spring crops, I’m REALLY interested in learning to grow potatoes. I’m  hoping to start soon since they’re a cold weather crop. We’ll see if I can make it before it gets too warm. As part of my plan, I’ll be researching different ways to grow potatoes and I’ll share what I find. This is what I know so far, you can set potato on window sill and it will sprout. You cut the sprout with enough potato and plant it. This comes from a brief conversation this past weekend with Farmer Deb. Let’s see what else I learn for now I leave you with this…

‘GROW POTATOES IN GARBAGE CAN’ INSTRUCTIONS:

STEP 1: Turn your garbage can upside down and drill several holes in the bottom of the can. Add a few around the outside wall, 3 to 6 inches up from the bottom. It’s really important to have good drainage or your potatoes will rot in a hurry.

STEP 2: Dump about 2/3rds of your bag of potting soil in the can. Mix in 1 cup of your fertilizer and set aside.

STEP 3: For your seed potatoes, small ones can be planted whole. The larger potatoes should be cut up into pieces with no less then 3 “eyes” per piece (“eyes” being those brown dimples that the roots will grow out of). Let your potatoes dry out on the cut side before you plant them

STEP 4: Once your cut potatoes have cured, plant them in your can 5 inches apart and cover with the remaining soil. You’ll only need 4 starts to a can. Set the can in an area that receives 4 to 6 hours of direct sunlight.

STEP 5: Water thoroughly and keep the soil moist but not soggy during the growing season. Don’t let the soil dry out or you’ll end up with misshaped potatoes. On the hot summer days, your potato garbage can might even need to be watered daily (you might move the can to a slightly shadier location on the hottest days).

STEP 6: As the plants start to grow in the can, mound up compost around plant stems keeping the leaves uncovered. They grow a little more, add some more compost. You’ll be able to fill up the entire can with compost by the end of the growing season. Keep it watered.

STEP 7: As the plants start to grow in the can, mound up compost around plant stems keeping the leaves uncovered. They grow a little more, add some more compost. You’ll be able to fill up the entire can with compost by the end of the growing season. Keep it watered.

SOURCE: EHOW By GreenGardenChic


STARTING YOUR SPRING GARDEN… January 29, 2010

Starting Your Spring Garden
FROM Truly Living Well (www.trulylivingwell.com)

A local CSA (Community Supported Agriculture) managed by Mr. K. Rashid Nuri…

Mr. K. Rashid Nuri

Now is the time to plan and build an organic spring garden at your home. What is the first step?

Determine the best place for your garden. The garden should be located in an area that is fully exposed to the sun. You will pay more attention to your garden the nearer it is to the house. Make sure that water is readily available.

The single most important factor in creating a successful garden is soil preparation. I call it dirt making. Get the soil right.  If you create good healthy soil, the plants which grow in that soil will also be healthy. Healthy plants are disease resistant.

Begin soil preparation by gently turning the soil. If this is the first time the land is being used to grow food, a tiller may prove helpful. Too much tillage destroys soil structure. Subsequent soil preparation can be done with a spade or garden fork.

After opening the soil add copious amounts of organic material such as compost, leaf mold, well rotted sawdust or decomposed animal manure. You can make your own compost or purchase it from most garden supply stores.

Compost is the key to successful gardening. Compost added to gardens improves soil structure, texture, aeration, and water retention. When mixed with compost, clay soils are lightened, and sandy soils retain water better. Mixing compost with soil also contributes to erosion control, soil fertility, proper pH balance, and healthy root development in plants.

Make beds in the garden that are separated by walkways. You do not want to walk in the area that you plant with vegetables. Walking on a vegetable bed compacts the soil and retards plant growth.

Utilize the garden space wisely. Select crops you will eat and enjoy. You must like what you plant or the garden space and the food will both be wasted. Decide what you want to plant and where you will plant it. Know what you will plant after the spring season crop is finished. Southern exposure has the most light. Tall crops should be planted on the north and west side of the garden to prevent shading of smaller plants.


(more…)


FIND YOUR AVERAGE LAST FREEZE… January 26, 2010

FIND YOUR AVERAGE LAST FREEZE…

http://www.motherearthnews.com/Organic-Gardening/How-to-Find-Average-Last-Spring-Frost-Date.aspx

WHAT TO GROW IN MARCH…

VEGETABLES Sow Indoors Sow Outdoors Transplant
Arugula XXX
Asparagus XXX
Beet XXX
Broccoli XXX XXX
Cabbage XXX XXX
Carrot XXX
Celery XXX
Chard XXX
Eggplant XXX
Endive XXX XXX XXX
Fava bean XXX
Fennel, bulb XXX
Kale XXX XXX
Kohlrabi XXX XXX XXX
Leek XXX XXX
Lettuce XXX XXX XXX
Mache XXX
Onions, bulb XXX
Pac choi XXX XXX XXX
Parsnip XXX
Peas (snow, shell, snap) XXX
Peppers XXX
Potatoes XXX
Radishes XXX
Rhubarb XXX
Radicchio XXX XXX XXX
Scallion (green onion) XXX XXX
Sorrel XXX
Spinach XXX XXX
Tomato XXX
Turnip XXX
CULINARY HERBS Sow Indoors Sow Outdoors Transplant
Basil XXX
Chives XXX XXX
Cilantro XXX
Dill XXX
Fennel, leaf XXX
Horseradish XXX
Marjoram XXX
Parsley XXX XXX
Rosemary XXX
Sage XXX
Savory, summer XXX XXX
Thyme XXX


WEST END FALL FEST-October 24th! October 12, 2009

A+E copy-1


UPDATE: FUNDRAISING FOR OUR PARK July 30, 2009

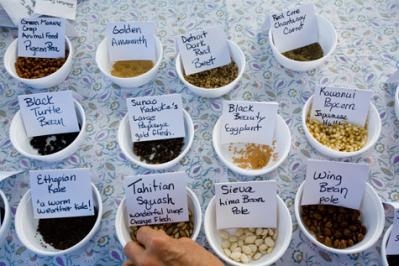
Seed Swap

picture from mother earth news, craig elevitch

So here’s the UPDATE: I’m working to get our fundraising stuff in place now that we have a 501C3 fiscal agreement w/ Park Pride.

Base on our last meetings this is what we’re doing…

  • FALL FEST-At our last meeting people were interested in a Fall Fest in the West End Park that can highlight and promote some of our urban farming initiatives but also provide activities for young children. We were thinking pumpkins, hay, etc. We talked about a seed swap, local urban farmers bring fresh veggies from their gardens, a map of gardens in the West End/SW Atl and more. If you’re interested in joining the planning committee (which promises to be much fun) please email me: yomara@9to5.org
  • SIDEWALKS-one of the major repairs needed in our park is our sidewalks-especially our lovely brick sidewalk (north of the park) which currently makes it difficult for individuals w/ strollers or wheel chairs. Unfortunately, the city is in a major budget crisis and we don’t know how much help they’ll provide! I’m working to put pressure on the City in the meantime, we’re considering kicking off a ‘brick by brick’ fundraising campaign to cultivate private donors and get it FIXED! I’m researching how much it will be to have engraved bricks and once I know we’ll have an outline so neighbors can support by buying a brick!
  • FUNDRAISING EVENTS-we’ve talked about doing a semi-formal at the park possibly on the basketball court w/ live music. We’re thinking Spring. We’re still exploring our options. If anyone is interested-please email me at yomara@9to5.org.
  • GRANTS-I’m writing a couple of small grants to get rain barrels and start a small children’s garden/outdoor classroom. If funds are secured- we may need some of you handy neighbors to help with some of the projects.

The fall promises to be a busy season. Your INVOLVEMENT is MUY important!

  • Next Friends of the West End Park meeting is on August 19, 2009, 10:30am, location TBA
  • Next Clean-up is on August 15 at 10:30am (this time we’ve been promised mulch!)

Donations ARE TAX-DEDUCTIBLE and can be made to:

Friends of the West End Park

Mail to: Friends of the West End Park, 1080 OAK ST SW, Atlanta, GA 30310.

Thanks and I’ll keep you posted!


WHAT TO PLANT IN AUGUST in GA… July 22, 2009

VEGETABLES

Sow Indoors

Sow Outdoors

Transplant

Bean, bush snap XXX
Beet XXX
Broccoli XXX XXX
Brussels sprouts XXX XXX
Cabbage XXX XXX
Carrot XXX
Cauliflower XXX XXX
Chard XXX XXX XXX
Chinese cabbage XXX
Collards XXX
Cucumber XXX
Kale XXX XXX XXX
Kohlrabi XXX XXX XXX
Lettuce XXX XXX XXX
Mustard XXX
Parsnip XXX
Potato XXX
Radish XXX
Rutabaga XXX
Squash, summer XXX
Spinach XXX
Turnips

XXX
CULINARY HERBS Sow Indoors Sow Outdoors Transplant

Basil

XXX
Chives XXX
Cilantro XXX
Parsley XXX

source: http://www.motherearthnews.com


DRYING HERBS July 18, 2009

thyme

thyme

Today-I spent some time harvesting herbs: thyme, oregano, lavender, sage and mint. I decided to air dry some of the herbs for future use. My research shows it’s best to dry herbs that don’t hold a lot of mositure such as Bay, Dill, Marjoram, Oregano, Rosemary, Summer Savory and Thyme. Moisture dense herbs, like Basil, Chives, Mint, Tarragon preserve better in a dehydrator, or try freezing them.

herb blooms

blooms change the taste of your herbs

It’s said it’s best to harvest herbs before the plant blooms. I share this because I let my mint plant  bloom and I didn’t know what to do with it. The flowers are edible but for the best tasting mint, you should harvest before there is a bloom. If your mint plant has already bloomed, I learned today, you can cut the flower and use the mint leaves that grow in the new branches so you can still harvest your mint through the summer months.

preparing the herb bundles, paper bag + materials

preparing the herb bundles, paper bag + materials

After much reading, I decided to dry the herbs in paper bags. I punched holes so the air will flow and I’m hoping the bags will shield the light and allow the plants to dry in a couple of weeks.

my new mask...

my new mask...

Next, I placed the bundles in the bags and used a rubber-band to secure them . It worked out great, the bags stand on their own so you don’t have to hook them to anything. I do plan to hang bunches on hooks because it looks beautiful but for now, I want to make sure the flavors remain and the herbs are good for cooking. After drying, the herbs can be used for about a year. I’ll let you know how it goes!

done!

done!


Declare Your Food Independence for 4th of July June 30, 2009

Filed under: sustainable living — WEsprouts @ 11:05 pm
Tags: , , , ,

food independence

This year, celebrate the 4th of July by eating locally (and that doesn’t mean your local fast food chain!). Declare your food independence by serving ingredients and produce from local farmers and producers at your holiday get-together. Kitchen Gardeners International, a nonprofit organization located in Maine, has proclaimed this 4th of July “Food Independence Day.” Their goal is to connect, serve and expand the global community and promote kitchen gardening, home cooking, and sustainable local food systems. Join the over 5,000 people who have pledged to eat a meal made with local food on July 4th by signing up at www.foodindependenceday.com.

– S.H.

SOURCE: KIWI NEWSLETTER


Tomatoes are here…let’s cook! June 28, 2009

Filed under: Handmade/DIY — WEsprouts @ 11:07 pm
Tags: , , , , ,

DSCF0163

      • BLACK-BEAN AND TOMATO QUINOA RECIPE
  • Quinoa is a fast-cooking, protein-packed whole grain.
  • Steamed, it makes a perfect partner for lime-spiked black beans and fresh tomato.
  • (more…)